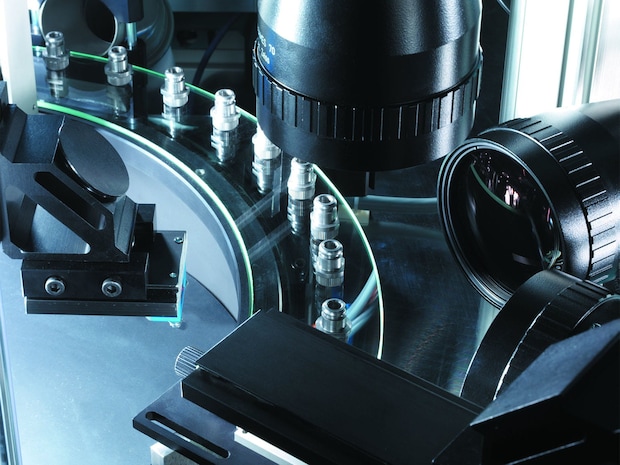
Our powerful Vision-Systems realize complex optical inspection tasks.

Powerful Vision-System
Our multi-sensor capable vision systems have the capability of operating multiple cameras in parallel, or serially, and having very short cycle times allowing high part throughputs to be achieved. The multilingual software is very easy to use, with a comprehensive function library for 2D as well as 3D applications and enables detailed data management (e.g. statistical analyses).
Jenoptik vision systems can be integrated into machines, systems and tools, used in laboratory setups, or form the heart of complete inspection and sorting systems. They are fully capable of communication via multiple types of interfaces. They are indispensable in process automation and enable tool and process monitoring as well as processand quality control.
Typical inspection tasks
- High-precision external contour inspection of components
- Position detection
- Presence, completeness, and position control
- Attributive tests
Find the right hardware and software for your optical inspection tasks
Measuring computers and accessories for your Vision-Systems
Our vision systems are PC-supported
Our vision systems are PC-supported devices that run under the Windows 10 operating system and previous versions. Their multi sensor capability allows the use of the cameras, or camera combinations, best suited for the respective applications, i.e., both monochrome and color cameras and cameras with different sensor formats and resolutions.
Other components can also be integrated into the equipment, such as light barriers, triangulation sensors, peripheral controllers, etc..
The use of tele-centric measuring lenses and application-optimized illumination is the prerequisite for achieving high inspection accuracy.
Our measuring computers at a glance
| Parameters | Standards | Compact Units | |
|---|---|---|---|
| Basic device | PC industrial housing | Panel-PC | |
| Cameras | monochrome, color | ||
| Resolution | all | all | |
| Number of cameras | up to 16 | up to 4 | |
| Digital I/O-Card | 8 Bit up to 32 Bit | 8 Bit | |
| Profibus/Profinet | applicable | alternative to I/O | |
| Monitor | separate | integrated | |
Cameras and Sensors
- Monochrome and color cameras
- Line scan and matrix cameras
- Different sensor formats and resolutions
- 3D sensor technology
Lenses
- Telecentric with object field sizes up to approx. 250 mm
- Entocentric with different focal lengths
- Filter for ambient light attenuation and lens protection
- Prism and mirror attachments
Lighting
- Permanent and flashing LED lights
- Wavelengths 365 nm to 850 nm
- Parameterizable lighting controllers
- Special designs
PC accessories
- Frame grabber
- I/O boards digital, ProfiNet and ProfiBus
- USV
- Monitors with and without touch function
- Connection and adapter cable
Use our software for your Vision-System

Vision-System Software
- Networking of multiple systems
- Control center with central article management
- Data exchange with customers and suppliers
- Remote system access
Flexibly adjustable software interface
- Multiple screen options (results table, live graphic, and live histogram for each independent characteristic, as well as defect images).
- Individual number, size and, position of windows
- Optional simultaneous display of all camera images in live zoom
- Counter displays
- Free setting of languages, colors, layouts and output formats
Create complex test sequences easily
- Power editor
- Intuitive operation (configure - do not program)
- Quickly create new applications
- Parameter change of all characteristics in an overview
- Transfer complex test sequences at one click
Software functions
- Extensive measurement library
- Contour checks
- Surface inspections with monochrome and color cameras
- Special tools
- Integrated measurement system analysis (MSA according to methods 1 and 3)
- Different operating modes configurable (bypass/automatic operation)
- System always "activated"
- Signals for external connection
- Measurement on defect images
- Multi-level user system
Results data
- Flexible data output
- Measurement results as ASCII or XML
- Statistical data preparation as random sample in control chart
- Order related counters
- Total, IO / NIO counter
- Histogram counter per characteristic
- Error images (jpg, bmp)
- Local data output or via LAN
Network Capability
- Networking multiple systems
- Control center with central article management
- Data exchange with customers and suppliers
- Remote system access
Artificial intelligence used for optical inspection

- Classification - recognition of predefined parts or properties
- Anomalies - detection of any deviation from an ideal
Both challenges can be solved using artificial intelligence – or so called deep learning (machine learning). In contrast to the standard tools of image processing, no test job tailored to the specific article is created, instead a learning procedure is run using a large number of real images.
The learning process takes place on a separate training station, while the deep learning module for 100% inspection is integrated into our vision software. Supported by a power graphics cards, even fast applications can use the tools of artificial intelligence.
Grouping of the parts in defined classes
- Example classification of known defects
- Prerequisite availability of a sufficient number of parts per defect class
Detection of any deviations (anomalies/defects) from a trained ideal part
- Training on the basis of faultless parts, recognition of defects that were unknown at the time of training
Examples for customized testing and sorting systems
Continuous testing of small parts
Testing on rotating glass ring

Testing on rotating glass ring
Operating principle
- Continuous part transport on rotating glass ring
- Testing with 4-8 cameras from different perspectives
- Product-specific conveying and separation systems
- Sorting error related possible (e.g. for rework)
Dimensions
- W x D x H = 810 mm x 1,000 mm x 2,130 mm
- Height with open hood approx. 2,800 mm
Test parts
- Outer diameter up to approx. 50 mm
- Prerequisite: Parts must have a flat support surface for placing on the glass ring
Testing Services
- Testing accuracy 0.001 mm to 0.01 mm, depending on part size
- Part throughput up to 300 parts / minute
Benefits
- High part throughput
- Inspection from multiple views
- Minimal changeover effort
Clocked inspection of small parts

Timed Sorting Machine
- Test criteria: geometry (dimensional accuracy), surface quality, sorting purity, etc.
- Performance: > 60 parts per minute (depending on parts and tasks)
- Test technology: CVS image processing with up to 8 high-resolution cameras
- Handling: storage hopper, feeding and packaging systems
- Dimensions: customer specific
Testing with part-specific automation
Individual positioning of the parts

Testing of turning parts for airbags
Operating principle
- Handling of the parts specific to the article (lying, standing, hanging ...)
- Start-stop operation or continuous throughput
- Part rotation of 360° in start-stop operation in front of the cameras
- Testing with up to 10 cameras from different perspectives
- Sorting error-related possible (e.g. for rework)
Dimensions
- Depending on the requirement profile
Test parts
- Length / diameter up to approx. 100 mm
- Part geometry generally rotationally symmetrical, but also with free forms
Testing services
- Testing accuracy 0.001 mm to 0.01 mm, depending on part size
- Throughput 10 - 200 parts/ minute
Benefits
- Comprehensive inspection of the parts
- Inspection from multiple views
- Integration of further test equipment possible (e.g. eddy current)
Find more products
Please contact us.


